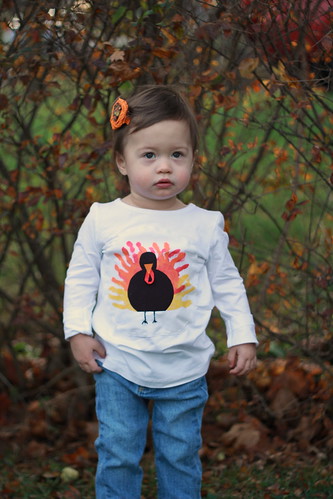
Partial cast of characters:

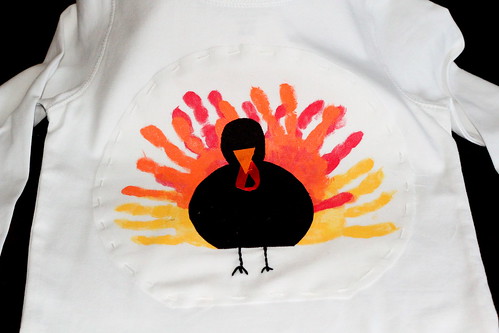
2. Paint up both hands and stamp on the fabric (I used 100% cotton) overlapping the body lines a bit. Fill in areas with a paintbrush. Let dry.
3. Repeat with other colors. Set paint per manufacturer directions.
4. Iron fusible web to the back of a brown piece of fabric. Cut a turkey body shape and fuse on to the background fabric. You could sew this on.
5. Iron fusible web to an orange piece of fabric. Cut into a triangle shape (this is the beak).
6. Take a piece of red ribbon and make a loop. Secure end with fabric glue. Let dry.
7. Lay the ribbon in place with the orange beak on top. Fuse to the body fabric.
8. Stitch legs and feet with embroidery thread. Or, sew on a sewing machine, use ribbon, rickrack, whatever you've got on hand.
The hair flower clip is a la a tutorial from A Girl and a Glue Gun. Gobble gobble.
Linked here: 5 Days...5 Ways, The Train to Crazy, Between U and Me, Fireflies and Jellybeans and Somewhat Simple
No comments:
Post a Comment